Lifeproof flooring is a popular choice for many homeowners because it is durable and easy to maintain. But what if you need to cut the flooring around a toilet? Luckily, we did our research to discuss this project properly.
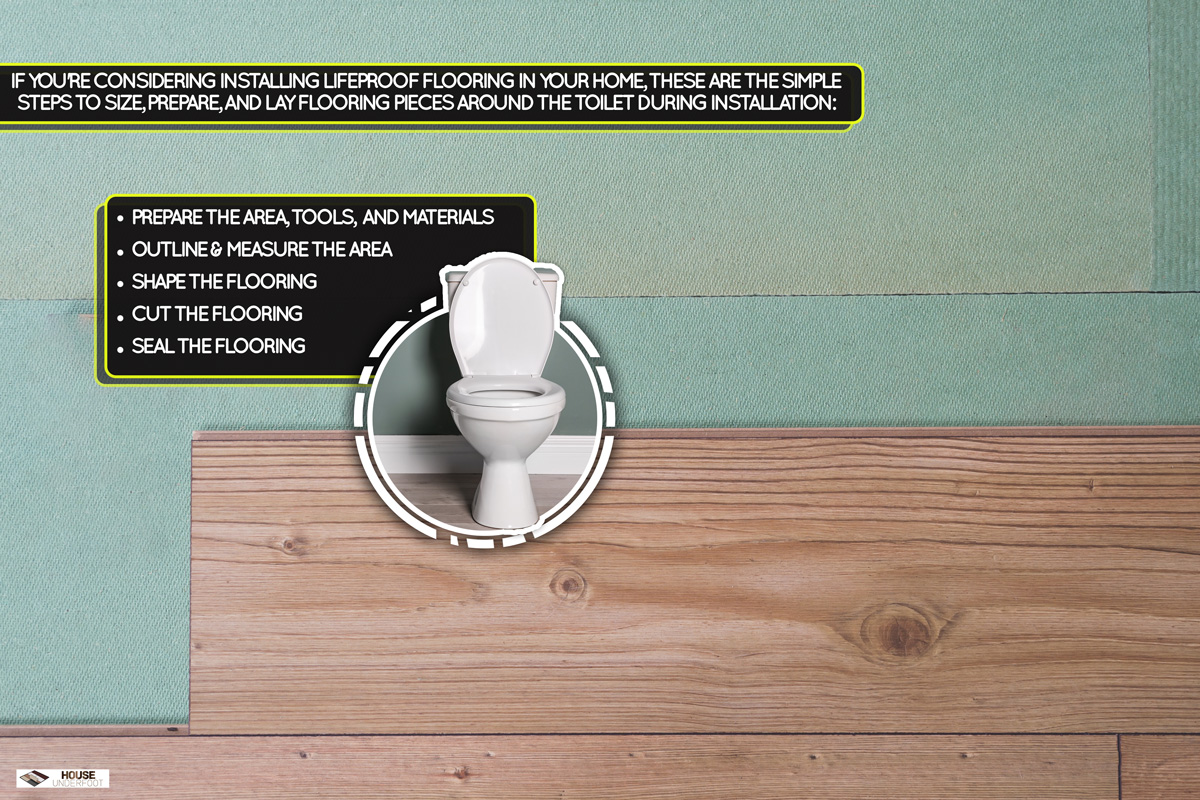
Lifeproof flooring is water-resistant and can be installed in any room in the house, including bathrooms and kitchens. If you're considering installing Lifeproof flooring in your home, these are the simple steps to size, prepare, and lay flooring pieces around the toilet during installation:
- Prepare the Area, Tools, & and Materials
- Outline & Measure the Area
- Shape the Flooring
- Cut the Flooring
- Seal the Flooring
In this guide, we will walk you through the process of cutting Lifeproof flooring around a toilet in a few easy steps. It can be tricky, but with these steps, you can do it easily! Just follow these simple tips to get the job done right.
Steps to Cut the Lifeproof Flooring Around a Toilet
When it comes to cutting the Lifeproof flooring around a toilet or even in other areas of your bathroom, there are a few things you need to do in order to ensure a perfect fit.
1. Prepare the Area, Tools, & Materials
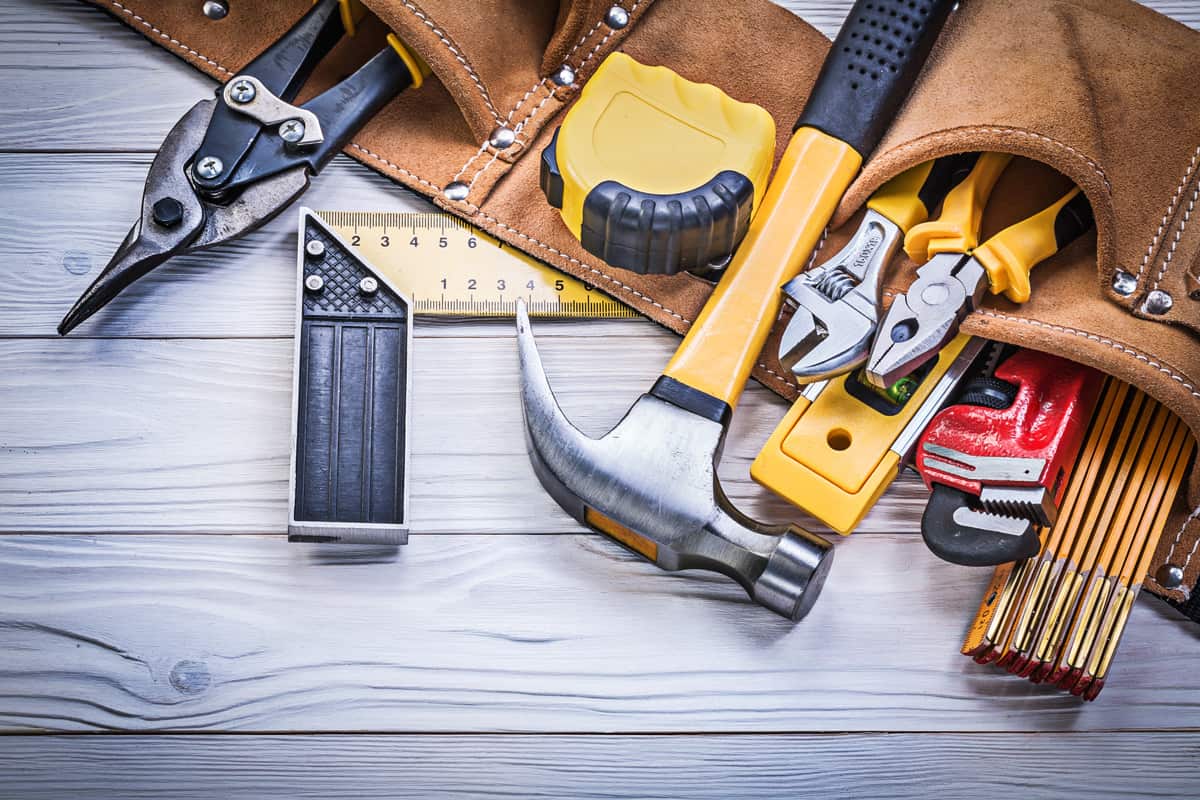
Before beginning a project like cutting Lifeproof around a toilet, it's important to take the time to properly prepare the area and materials. This will help ensure that the job is done correctly and efficiently. Make sure that the area is clean and free of debris.
Once you have all of your materials and tools ready, you can begin cutting the Lifeproof. We'd suggest having these tools and materials on hand:
- pencil
- straight edge or ruler
- laser level
- jigsaw or power saw
- utility knife
- sandpaper or sanding block
- silicone caulk
2. Outlining
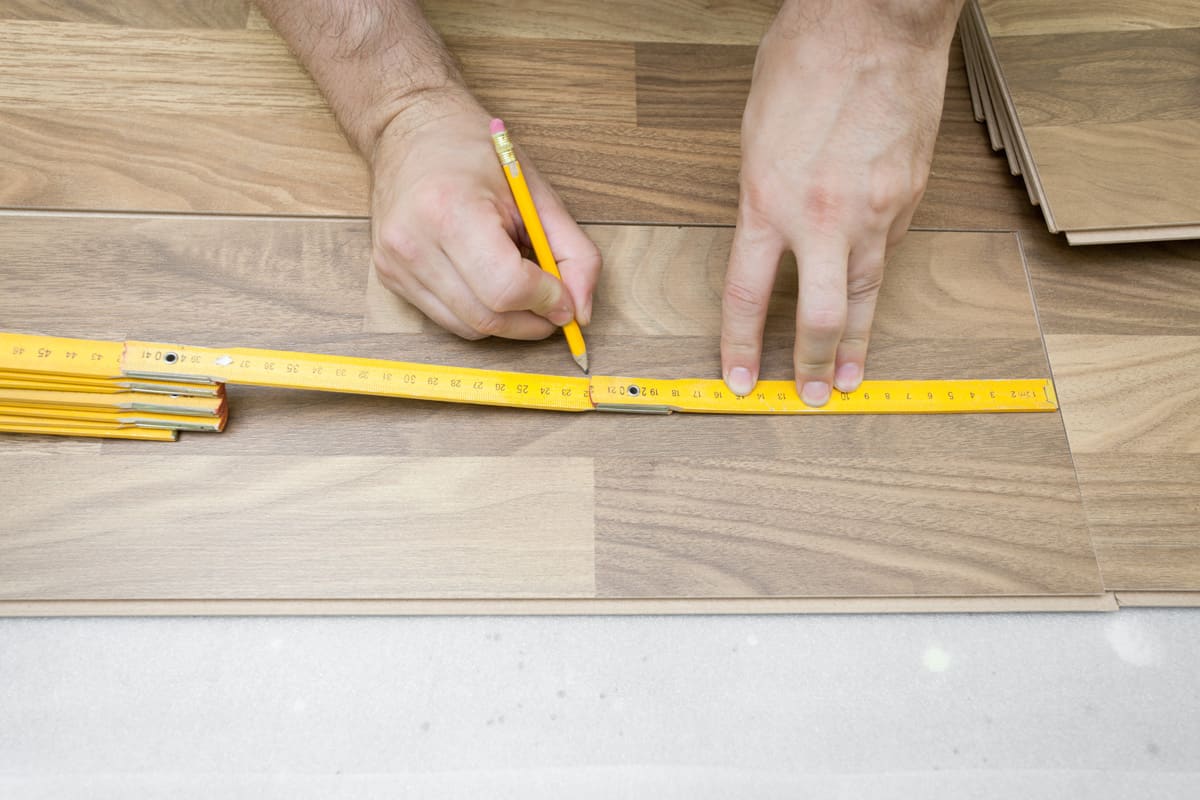
The next step is to outline the area where you want the flooring to go. This can be done with a pencil and paper or by using a laser level. Once you have the area outlined, you can start to shape the flooring.
3. Shaping
The following step is to shape the Lifeproof flooring. This can be done with a jigsaw or by using a power saw. If you're using a jigsaw, be sure to use a sharp blade so that you don't damage the flooring.
4. Cutting
Start by placing the straightedge along the edge of the toilet base, and then score the flooring along the straightedge with the utility knife. Then, use the utility knife to carefully cut through the scored line. Be sure to cut slowly and evenly in order to avoid cracking or chipping the flooring.
Once you have cut through the entire line, you will be able to lift the flooring piece away from the rest of the sheet.
If necessary, use a sanding block or file to smooth away any rough edges along the cut line.

![]()
5. Sealing
Once you've made the cut, seal the edge of the flooring with silicone caulk to help prevent water damage. Allow the caulk to dry completely before moving on to the next step.
Now you can install the flooring in the bathroom according to the manufacturer's instructions. Make sure to follow all instructions carefully in order to avoid any damage to the flooring.
With these easy steps, you can cut Lifeproof flooring around a toilet like a pro! Just be sure to take your time and measure twice before making any cuts. With a little patience, you can achieve a perfect fit.
What Are Some Tips for Cutting the Flooring Around a Toilet?
When it comes to cutting flooring around a toilet, there are a few things you need to keep in mind.
- First, always use a sharp blade. This will help to prevent chipping and ensure a clean cut.
- Second, take your time and measure twice before cutting. This will help to avoid any mistakes that could ruin your flooring.
- Finally, be sure to wear protective gear, such as gloves and safety goggles, when cutting the flooring around a toilet.
By following these simple tips, you can ensure a smooth and successful installation.

![]()
What Should You Do if You Accidentally Cut the Flooring Around a Toilet?
If you're renovating your bathroom, one of the first things you'll need to do is remove the old toilet. This can be a tricky process, and it's easy to accidentally damage the flooring around the toilet. If this happens, don't panic! There are a few simple ways to fix the problem.
- First, use a sharp utility knife to cut away any loose or damaged vinyl flooring.
- Next, use a putty knife to apply a generous amount of epoxy putty to the damaged area.
- Once the putty is in place, use a wet rag to smooth it out and blend it with the surrounding vinyl.
- Finally, let the epoxy cure for 24 hours before installing the new toilet. With a little time and patience, you can easily repair any damage caused by removing an old toilet.

![]()
Check epoxy putting on Amazon.
Is It Worthy Install Lifeproof Flooring Around Your Toilet?
Many people choose to install Lifeproof flooring in their homes because it is durable and easy to clean. However, some people question whether or not Lifeproof flooring is really worth the investment. After all, it is not indestructible, and it can be expensive.
For those who are on the fence about installing Lifeproof flooring, here are a few things to consider.
First of all, Lifeproof flooring is designed to withstand a lot of wear and tear. It is scratch-resistant and water-resistant, making it ideal for high-traffic areas such as the kitchen or bathroom. In addition, Lifeoproof flooring is easy to clean, so you won't have to spend hours scrubbing your floors.
Another thing to consider is that Lifeproof flooring can help you save money in the long run. Because it is so durable, you won't have to replace your flooring as often as you would with other types of flooring. In fact, Lifeproof flooring comes with a lifetime warranty, so you can rest assured that it will last for many years.
If you are still undecided about whether or not to install Lifeproof flooring in your home, take a look at your budget and decide if the investment is worth it for you. You may find that the durability and easy maintenance of Lifeproof flooring make it worth the extra cost.
How Do You Make Sure the Flooring Is Waterproof Around a Toilet?
Waterproofing your floors around the toilet is important to prevent damage from leaks or spills. There are a few different ways you can do this.
Apply Waterproof Sealant on the Floor

One way to waterproof the floor is to use a waterproof sealant on the floor. This can be applied with a brush or roller and should be allowed to dry according to the manufacturer's instructions before applying a second coat.
Install Vinyl Sheet or Membrane
Vinyl flooring barriers should be installed over the entire floor area, including under the toilet, and should be sealed at the edges. If using Lifeproof, refer to the manufacturer's recommendations; typically, 6 mil thickness barrier is recommended.
Install Waterproof Mat Under the Toilet
The best way to waterproof the area around a toilet is to use a waterproof mat. These mats are designed to sit under the toilet and provide a barrier against leaks. They are made of durable materials that will not break down if exposed to water. Waterproof mats are an essential part of bathroom design, and they can help to prevent costly damage from leaks.
Note, however, if you are installing Lifeproof flooring you should strictly follow the manufacturer's instructions regarding the underlay materials. Lifeproof has a pre-installed soundproofing mat, and using an additional mat underlay could void the warranty for some new Lifeproof flooring types.
Install a Rubber Gasket
One way to prevent toilet leaks is to install a rubber gasket around the base of the toilet. This will help to create a water-tight seal between the toilet and the floor, and it will also prevent urine and other liquids from seeping out into the flooring.
By taking these precautions, you can help protect your floors from water damage.
How Can You Make Sure Your Lifeproof Flooring Is Well-Maintained?
Lifeproof flooring is a great option for busy families because it is easy to maintain. However, there are a few things you can do to ensure that your flooring always looks its best.
- First, sweep or vacuum regularly to remove dirt and debris.
- Second, mop with a damp cloth or mop specifically designed for use on laminate floors. Avoid using harsh cleaners or scrubbing too vigorously, as this can damage the flooring.
- Finally, wipe up spills immediately to prevent staining.
With just a little bit of care, your Lifeproof flooring will stay looking like new for years to come.
Final Words
When cutting the flooring, it is important to use a straight edge and a sharp blade. Make sure that you measure twice before making any cuts. Cutting the flooring around the toilet can be tricky, but with some patience and careful measuring, you can do it yourself.
If you have any questions or concerns about bathroom renovation, see our posts below:
![Laminated flooring planks to be installed in a modern room, Can You Install Vinyl Plank Flooring Backward? [And How To!]](https://houseunderfoot.com/wp-content/uploads/2022/10/Laminated-flooring-planks-to-be-installed-in-a-modern-room-600x400.jpg)